Enroll Your Plant in Summer School: A 12-Week Repotting Curriculum, One Week at a Time
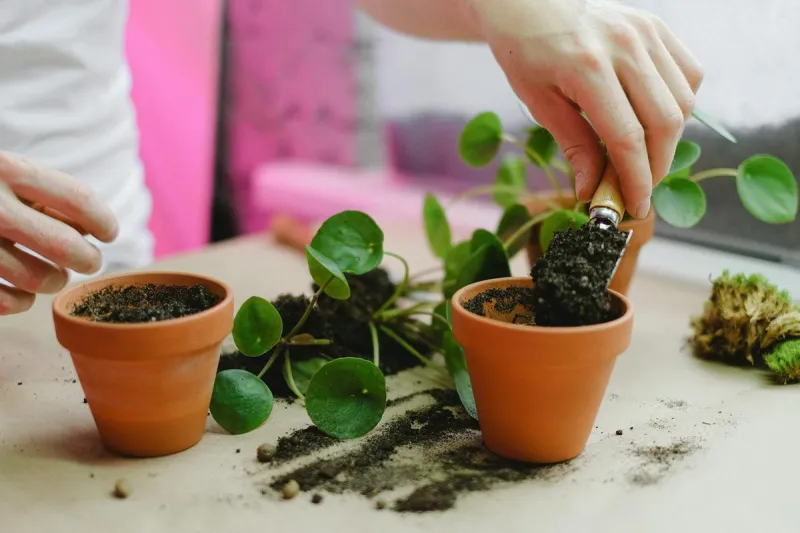
Photo: hands repotting houseplant into terracotta pot with fresh soil on table, via plantyoflove.com
Every spring, American garden centers roll out the red carpet: racks of terracotta in every size, pallets of potting mix stacked by the register, and houseplants pushing out new leaves like they're trying to impress the admissions committee. That's your cue. Spring and early summer — roughly May through August for most of the US — is when your plants wake up and start growing, which makes it the ideal window for repotting. Roots heal faster, new soil gets put to work immediately, and any transplant shock is short-lived.
But here's the thing most plant parents get wrong: repotting isn't a single Saturday chore. Done right, it's a curriculum. So grab a notebook (or just this tab) and treat the next twelve weeks like a summer course. Your plant is the student. You're the professor. Attendance is mandatory.
Weeks 1–2: Orientation — Is Repotting Even Required?
Not every plant needs to move. Before you buy a single bag of soil, run the placement exam:
- The root check. Gently slide the plant out of its pot. Are roots circling the root ball in tight loops, or poking out of the drainage holes? That's a passing grade for repotting.
- The water test. Does water rush straight through the pot, or does the plant dry out within a day of watering? Compacted, exhausted soil drains too fast to hydrate roots.
- The growth audit. Has your plant stalled despite good light and regular feeding? Crowded roots are a common culprit.
If your plant passes none of these tests, congratulations — it stays in its current dorm room. Repotting unnecessarily stresses a perfectly happy plant.
Weeks 3–4: Choosing the Right Dorm — Pot Size and Material
Here's the most common midterm failure: upsizing too much. A pot that's too big holds soggy soil the roots can't reach, and that's how root rot starts. The rule is simple — go up one pot diameter, usually 1 to 2 inches for smaller plants and 2 to 3 inches for large floor plants.
Material matters too:
- Terracotta wicks moisture away — great for succulents, snake plants, and anyone who overwaters.
- Plastic and glazed ceramic hold moisture longer — better for calatheas, ferns, and thirsty tropicals.
- Whatever you choose, drainage holes are non-negotiable. No holes, no deal.
Weeks 5–6: The Syllabus Materials — Mixing Your Soil
Bagged all-purpose potting mix is a fine starting point, but think of it as a base textbook, not the whole course. Customize by student type:
- Tropicals (pothos, philodendron, monstera): potting mix plus a handful of perlite for airflow.
- Succulents and cacti: half potting mix, half perlite or coarse sand — these students hate wet feet.
- Figs and dracaenas: standard mix with a bit of bark chunk for structure.
Skip garden soil entirely. It compacts in containers and can carry pests and fungus that don't belong indoors.
Weeks 7–8: Moving Day — The Transplant, Done Gently
Pick a mild day, water the plant the day before (moist roots slide out easier), and set up your workstation: new pot, fresh mix, a tarp or newspaper, and a snack. This is the final exam, so take it slow.
- Loosen the root ball by squeezing or tapping the pot's sides, then ease the plant out — never by the stem.
- Gently tease apart circling roots with your fingers. A few torn roots are fine; plants recover.
- Add a base layer of fresh mix to the new pot so the plant sits at the same depth it was before.
- Backfill around the roots, tapping the pot to settle soil — don't pack it like you're tamping a baseball infield.
- Water thoroughly until it drains from the bottom, then let it be.
Weeks 9–10: Root Shock Recovery — The Quiet Weeks
Expect a little drama. A droopy leaf or two, a slower pace, maybe one yellowed leaf — that's transplant shock, and it's normal. Your job during recovery is restraint:
- No fertilizer for 4 to 6 weeks. Fresh mix already has nutrients, and fertilizer on stressed roots burns.
- Hold off on direct sun. Give the plant bright, indirect light while it settles in.
- Water less than you think. Roots absorbing water slowly means wet soil sticks around longer. Check before you pour.
Weeks 11–12: Final Grades — Post-Transplant Check-In
By late summer, the report card writes itself. New growth — a unfurling leaf, a thicker stem, visible momentum — means the transplant took. If the plant sulked through week ten and hasn't rallied, review the basics: light, watering rhythm, and whether the pot drains properly. Most late-summer struggles trace back to overwatering during recovery, not the transplant itself.
Then do something radical: nothing. Let the plant spend the rest of the summer just growing. Come fall, when light drops and growth slows, it'll head into the off-season with fresh soil, room to stretch, and a professor who finally understands that sometimes the best teaching is knowing when the semester's over.